Krissy & Sarah’s Recipe Exchange

Our Favorite Recipes

Almost No-Knead White Bread January 31, 2010

Filed under: Bread — Kristen @ 7:14 pm
Tags: ,

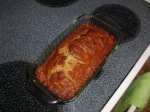
This was super easy, but it’s a lengthy process.  So if you want it for dinner, make sure you start it first thing in the morning.  Lots of rising time involved.  The outcome was spectacular though – totally worth the wait.

Makes 1 large round loaf

An enameled cast-iron Dutch oven with a tight-fitting lid yields best results, but the recipe also works in a regular cast-iron Dutch oven or heavy stockpot. (See the related information in “High-Heat Baking in a Dutch Oven” for information on converting Dutch oven handles to work safely in a hot oven.) Use a mild-flavored lager, such as Budweiser (mild non-alcoholic lager also works). The bread is best eaten the day it is baked but can be wrapped in aluminum foil and stored in a cool, dry place for up to 2 days.

INGREDIENTS

3 cups unbleached all-purpose flour (15 ounces), plus additional for dusting work surface

1/4 teaspoon instant or rapid-rise yeast

1 1/2 teaspoons table salt

3/4 cup plus 2 tablespoons water (7 ounces), at room temperature

1/4 cup plus 2 tablespoons mild-flavored lager (3 ounces)

1 tablespoon white vinegar

INSTRUCTIONS

  1. Whisk flour, yeast, and salt in large bowl. Add water, beer, and vinegar. Using rubber spatula, fold mixture, scraping up dry flour from bottom of bowl until shaggy ball forms. Cover bowl with plastic wrap and let sit at room temperature for 8 to 18 hours.
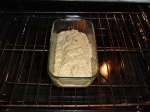
  2. Lay 12- by 18-inch sheet of parchment paper inside 10-inch skillet and spray with nonstick cooking spray. Transfer dough to lightly floured work surface and knead 10 to 15 times. Shape dough into ball by pulling edges into middle. Transfer dough, seam-side down, to parchment-lined skillet and spray surface of dough with nonstick cooking spray. Cover loosely with plastic wrap and let rise at room temperature until dough has doubled in size and does not readily spring back when poked with finger, about 2 hours.
  3. About 30 minutes before baking, adjust oven rack to lowest position, place 6- to 8-quart heavy-bottomed Dutch oven (with lid) on rack, and heat oven to 500 degrees. Lightly flour top of dough and, using razor blade or sharp knife, make one 6-inch-long, 1/2-inch-deep slit along top of dough. Carefully remove pot from oven and remove lid. Pick up dough by lifting parchment overhang and lower into pot (let any excess parchment hang over pot edge). Cover pot and place in oven. Reduce oven temperature to 425 degrees and bake covered for 30 minutes. Remove lid and continue to bake until loaf is deep brown and instant-read thermometer inserted into center registers 210 degrees, 20 to 30 minutes longer. Carefully remove bread from pot; transfer to wire rack and cool to room temperature, about 2 hours.
 

Lemon Glazed Blueberry Muffins January 30, 2010

Filed under: Muffins — Kristen @ 12:49 pm
Tags: , , , ,

As I was eating these I was thinking out loud that I should’ve put some of the zest directly into the batter – something that I’ll definitely try next time.  Phil seemed to think they were fantastic though, and I can’t say that I disagreed.  A yummy way to start off a cold and snowy Saturday morning.

Makes 12 muffins.

This recipe does not require a standing mixer, but when making the batter, be sure to whisk vigorously in step 2, then fold carefully in step 4. There should be no large pockets of flour in the finished batter, but small occasional sprays may remain. Do not overmix the batter.

INGREDIENTS

2 cups unbleached all-purpose flour (10 ounces)

1 tablespoon baking powder

½ teaspoon table salt

1 large egg

1 cup granulated sugar (7 ounces)

4 tablespoons unsalted butter , melted and cooled slightly

1 ¼ cups sour cream (10 ounces)

1 ½ cups frozen blueberries , preferably wild

1 teaspoon lemon zest or grated fresh ginger

¾ cup granulated sugar

¼ cup lemon juice

INSTRUCTIONS

  1. Adjust oven rack to middle position and heat oven to 350 degrees. Spray standard muffin tin with nonstick vegetable cooking spray.
  2. Whisk flour, baking powder, and salt in medium bowl until combined.
  3. Whisk egg in second medium bowl until well-combined and light-colored, about 20 seconds. Add sugar and whisk vigorously until thick and homogenous, about 30 seconds; add melted butter in 2 or 3 steps, whisking to combine after each addition. Add sour cream in 2 steps, whisking just to combine.
  4. Add frozen berries to dry ingredients and gently toss to combine. Add sour cream mixture and fold with rubber spatula until batter comes together and berries are evenly distributed, 25 to 30 seconds (small spots of flour may remain and batter will be thick). Do not overmix.
  5. Use ice cream scoop or large spoon to drop batter into greased muffin tin. Bake until light golden brown and toothpick or skewer inserted into center of muffin comes out clean, 25 to 30 minutes, rotating pan from front to back halfway through baking time.
  6. While muffins are baking, mix lemon zest or grated fresh ginger and 1/2 cup sugar in small bowl.
  7. Bring lemon juice and 1/4 cup sugar to simmer in small saucepan over medium heat; simmer until mixture is thick and syrupy and reduced to about 4 tablespoons.

Remove muffins from oven onto wire rack, stand upright, and cool 5 minutes.

After muffins have cooled, brush tops with glaze, then, working one at a time, dip tops of muffins in lemon-sugar or ginger-sugar.

Set muffins upright on wire rack; serve.


Chicken with Lemon-Butter Sauce December 19, 2009

Filed under: Chicken — Kristen @ 1:53 pm
Tags: , , ,

Lemon Butter Chicken

This one’s super easy and quick.  Perfect for a night that you don’t have much time!  I found it in Martha Stewart Living, January 2010.

Ingredients:

  • 4 chicken breasts
  • Salt
  • Pepper
  • Extra virgin olive oil
  • Unsalted butter
  • 1/4 Minced shallot
  • 2 lemons (Note: I only used 1 and it was still very lemony)
  • 3/4 Cup low-sodium chicken broth (Note: I used regular, not low sodium)

Directions:

  1. Put breasts into ziploc bag and seal.  Pound breasts until they’re approximately 1/4″ thick.
  2. Season chicken breasts on both sides with salt and pepper.
  3. Heat 1 Tbsp. extra-virgin olive oil and 1 Tbsp. unsalted butter in a large skillet over medium-high heat until butter foams.
  4. Add 2 breasts (Note: 1 put all 4 in at once), and saute on 1 side until golden brown, about 2 minutes.
  5. Reduce heat to medium.  Flip and saute breasts until cooked through, about 2 minutes.
  6. Transfer to a plate.  Raise heat to medium-high, and repeat with remaining breasts (if cooking in 2 batches).
  7. Add 1/4 Cup minced or sliced shallot to skillet and cook over medium-high heat, adding oil or butter as needed, stirring often, until golden – about 1 minute.
  8. Raise heat to medium-high.  Add segments and juice of 2 lemons (Note: I only used one and it was right on the cusp of being too lemony for me…any more would’ve been overkill), 3/4 Cup chicken stock, and any plate juices, and deglaze the pan, scraping brown bits from bottom with a wooden spoon.
  9. Simmer until sauce reduces by half, about 3 minutes.
  10. Gradually stir in 2-3 Tbsp. of cold, unsalted butter (cut into small pieces) until just melted.
  11. Season to taste.

This was fantastic, served over baby spinach!

* Also try this with mushrooms, garlic, capers, Dijon mustard, tarragon, parsley and chives.  Try deglazing the pan with white wine or vermouth.


Speedy Mini Meat Loaves December 14, 2009

Filed under: Beef — Kristen @ 7:15 pm
Tags: ,

Size challenged meatloaf

I came across this recipe in The Deen Bros. Take It Easy: Quick and Affordable Meals the Whole Family Will Love.  It’s my new favorite cookbook.  But the recipe is also available on their website.

These were super easy to make, and tasted great.  Phil said it was the best meatloaf he’s ever tasted!  I paired it with baked potatoes and baby spinach with warm oil & walnuts.

Ingredients

  • 1 1/2 pounds ground beef
  • 1 cup plain unseasoned bread crumbs
  • 3 large eggs, lightly beaten
  • 3 tablespoons milk
  • 1 garlic clove, finely chopped
  • 1 medium onion, finely chopped
  • 1 1/4 teaspoons salt
  • 1 teaspoon minced fresh thyme
  • 3/4 teaspoon freshly ground black pepper
  • 3 tablespoons ketchup
  • 3 tablespoons Dijon mustard
  • 1 teaspoon Worcestershire sauce

Directions

Preheat the oven to 350°F. Lightly grease the cups of a 12-cup muffin pan.

In a large bowl, combine the beef, bread crumbs, eggs, milk, garlic, onion, salt, thyme, and pepper. Divide the meat mixture among the 12 muffin cups, pressing the meat firmly into the pan.

Place the muffin pan on a baking sheet and bake for 20 to 25 minutes, until the meat is almost cooked through—the “loaves” will be firm when pressed lightly in the center, but not set.

While the meat loaves are baking, whisk together the ketchup, mustard, and Worcestershire sauce. After baking for 20 to 25 minutes, remove the pan from the oven. Brush the tops of the loaves with the glaze, using it all up, and return the pan to the oven. Bake for 10 minutes more, or until the glaze has thickened and the meat is completely cooked through, 30 to 35 minutes total. Run an offset spatula or butter knife around the edges of the muffin cups and pop out the meat loaves. Serve hot.


Chicken Tortilla Soup December 13, 2009

Filed under: Chicken,Mexican,Soup — Kristen @ 4:42 pm
Tags: , , , ,

Mmmm...Spicy!


I started out the day wanting to make some hearty chicken soup.   Phil’s been asking for this a lot lately, and since it was a freezing cold, rainy day, it seemed like a great idea. I started out (cheating) by throwing a whole chicken into the crockpot before I went to bed – my foolproof Crockpot Rotisserie Chicken recipe.  I figured that would save me some time in the morning.  It did….but the problem was, I smelled it all night long.  Not that that’s necessarily a bad thing, but it kept waking me up.

The recipe turned out to be fairly easy and straightforward, but I had to rework it a bit since I didn’t have all the ingredients.  You’ll see, below, in my notes, where I altered things.  The one area that I feel the need to warn you about is when you pour the tomato/onion mixture into the hot oil.  Good Lord!  I thought my eyes were going to pop right out of my head.  Phil was upstairs at the time and he called down to me and said “What’re you making? My eyes are burning up here!”  I think half the eyes on the street were probably burning at this point.

All in all it was a yummy soup.  I’d make it again, for sure.  Although, I’d probably have to wear my goggles next time.


Tortilla Strips (NOTE: I cheated and used store bought corn tortilla strips)

  • 8 corn tortillas (6-inch), cut into 1/2-inch-wide strips
  • 1 tablespoon vegetable oil
  • Table Salt

Soup

  • 2 split bone-in, skin-on chicken breasts (about 1 1/2 pounds) or 4 bone-in, skin-on chicken thighs (about 1 1/4 pounds), skin removed and well trimmed of excess fat (NOTE: I pre-made my chicken, shredded it, and added it to the broth at Step #9)
  • 8  Cups low-sodium chicken broth (NOTE: I did not use low-sodium broth)
  • 1 very large white onion (about 1 pound), trimmed of root end, quartered, and peeled
  • 4 medium cloves garlic , peeled (NOTE: I had minced garlic on hand)
  • 2 sprigs epazote , fresh, or 8 to 10 sprigs fresh cilantro plus 1 sprig fresh oregano (NOTE: I used dried, ground oregano)
  • Table salt
  • 2 medium tomatoes , cored and quartered
  • ½ medium jalapeño chile (NOTE: I didn’t have one of these so I substituted a dash or two of Cayenne Pepper)
  • 1 chipotle chile en adobo , plus up to 1 tablespoon adobo sauce
  • 1 tablespoon vegetable oil

Garnishes

  • 1 lime , cut into wedges
  • 1 Hass avocado , diced fine
  • 8 ounces cotija cheese , crumbled, or Monterey Jack cheese, diced fine
  • fresh cilantro leaves
  • minced jalapeno pepper
  • Mexican crema or sour cream

INSTRUCTIONS

FOR THE TORTILLA STRIPS:

Adjust oven rack to middle position; heat oven to 425 degrees. Spread tortilla strips on rimmed baking sheet; drizzle with oil and toss until evenly coated. Bake until strips are deep golden brown and crisped, about 14 minutes, rotating pan and shaking strips (to redistribute) halfway through baking time. Season strips lightly with salt; transfer to plate lined with several layers paper towels.

FOR THE SOUP:

  1. While tortilla strips bake, bring chicken, broth, 2 onion quarters, 2 garlic cloves, epazote, and 1/2 teaspoon salt to boil over medium-high heat in large saucepan; reduce heat to low, cover, and simmer until chicken is just cooked through, about 20 minutes.
  2. Using tongs, transfer chicken to large plate.
  3. Pour broth through fine-mesh strainer; discard solids in strainer.
  4. When cool enough to handle, shred chicken into bite-sized pieces; discard bones.
  5. Puree tomatoes, 2 remaining onion quarters, 2 remaining garlic cloves, jalapeño, chipotle chile, and 1 teaspoon adobo sauce in food processor until smooth.
  6. Heat oil in Dutch oven over high heat until shimmering; add tomato/onion puree and 1/8 teaspoon salt and cook, stirring frequently, until mixture has darkened in color, about 10 minutes.  (NOTE: This is where my eyeballs almost fell out of my head, and my nose started running! So Beware!)
  7. Stir strained broth into tomato mixture, bring to boil, then reduce heat to low and simmer to blend flavors, about 15 minutes.
  8. Taste soup; if desired, add up to 2 teaspoons additional adobo sauce.
  9. Add shredded chicken and simmer until heated through, about 5 minutes.
  10. To serve, place portions of tortilla strips in bottom of individual bowls and ladle soup into bowls; pass garnishes separately.

I layered some broken tortilla chips in the bottom of the bowl, then added shredded Mexican mix cheese and a big dollop of sour cream, on top.  The sour cream definitely helps to cool it down a bit.


Irresistible Peanut Butter Cookies December 3, 2009

Filed under: Cookies — Kristen @ 3:02 pm
Tags: , , ,

Ready to eat

I found this one in a magazine, in an ad for Jif Peanut Butter.  I absolutely love peanut butter cookies, but only if they’re done perfectly.  These were!  Just the right amount of peanut butter flavor and just the right amount of chewiness.  I think I made them a tad too big though, as my batter didn’t come close to making 3 dozen, as the recipe states.

Ingredients:
  • 3/4 cup Jif® Creamy Peanut Butter
  • 1/2 stick Crisco® All-Vegetable Shortening Sticks, OR 1/2 cup Crisco® All-Vegetable Shortening
  • 1 1/4 cups firmly packed brown sugar
  • 3 tablespoons milk
  • 1 tablespoon vanilla extract
  • 1 large egg
  • 1 3/4 cups All Purpose Flour
  • 3/4 teaspoon baking soda
  • 3/4 teaspoon salt
Directions:
  1. HEAT oven to 375°F.
  2. Combine peanut butter, shortening, brown sugar, milk and vanilla in large bowl.  Beat at medium speed of electric mixer until well blended.
  3. Add egg. Beat just until blended.
  4. COMBINE flour, baking soda and salt.
  5. Add to creamed mixture at low speed. Mix just until blended.
  6. Drop by rounded tablespoonfuls 2-inches apart onto greased baking sheet. Flatten slightly in a crisscross pattern with tines of fork.
  7. BAKE one baking sheet at a time 7 to 8 minutes, or until set and just beginning to brown.
  8. Cool 2 minutes on baking sheet. Remove cookies to cooling racks to cool completely.
Yield: 3 dozen cookies
 

Auntie May’s Banana Bread

Filed under: Bread,breakfast,Coffee Cake/Bread — Kristen @ 9:56 am
Tags: , ,

Crispy outside, moist inside!

I’ve made tons of different banana bread recipes over the years.  But none can compare to the one my Mom always makes….Auntie May’s.  And I finally remembered to get a copy of it from her this past week.  It’s always moist, and just the right amount of banana taste.  The only problem is, it makes a small loaf.  So make a few at a time, or even just double the batch to make a large one.

Ingredients:

  • 1/2 Cup Melted Butter
  • 1/2 Cup Sugar
  • 1 Egg
  • 3 Mashed Bananas (Note: Use 4 if they’re small)
  • 1-1/2 Cups Flour
  • 1 tsp. Baking Soda
  • 1/4 tsp. Salt
  • 1 tsp. Vanilla
  • 1/2 Cup chopped Walnuts
  1. Preheat oven to 350.
  2. Melt butter.
  3. Mix all ingredients together in a medium bowl.
  4. Pour into baking dish(es) and bake for 55-60 minutes.

If you make extras and you can’t eat them all quickly enough, pop some in the freezer for later.


A Little Bit Southern, Shepherds Pie November 10, 2009

Filed under: Beef,casserole,Mexican — Kristen @ 2:03 pm
Tags: , , , , ,

Shepherd's Pie

This past weekend we had my brother-in-law in town, visiting from Cape Cod, MA, so I made sure I cooked him up a lot of yummy meals.  One of them was pot roast, Big Martha’s Mashed Potatoes with Cream Cheese, and spinach.  But now that he’s gone we’ve got to figure out what to do with all the leftovers.  What to do, what to do….

This is when Phil suggested to me, ‘make Shepherd’s Pie.’  Hmmm…I’ve never made a Shepherd’s Pie in my life.  I googled ‘shepherds pie’ and every recipe that came up was pretty much identical.  It basically just involves layering all the items in a baking dish and heat.  How hard could that be?

This recipe ended up being so easy I’ll probably be adding it to my ‘What to Make in a Pinch’ list.  It’s typically made with ground beef, but I substituted pot roast for the beef.  You could probably do chicken, turkey or whatever you happen to have in the fridge too.  This might be the perfect recipe when deciding what to do with our Thanksgiving leftovers.

Ingredients:

Leftover pot roast (or use ground beef)
Leftover mashed potatoes
1 Can of Mexican style niblets corn
1 handful of shredded, Mexican flavor cheese

  1. Preheat oven to 350.
  2. Layer pot roast into bottom of casserole dish
  3. Add veggie layer (mine was corn)
  4. Add potato layer
  5. Sprinkle with cheese
  6. Cover and bake 25 minutes
  7. Remove cover and cook an additional 5-10 minutes, until cheese is starting to brown.

Serve and eat!


Raisin Bran Muffins

Filed under: breakfast,Muffins — Kristen @ 12:13 pm
Tags: , , ,

Bran Muffin

Years ago, when I was working in Boston, MA I always got my morning, breakfast muffins at Souper Salad.  They had the most unbelievable zucchini/carrot muffins, and bran muffins.  And believe me when I say, I’m NOT a veggie girl.  By any stretch of the imagination.  So for me to like these you know they must be good.  Since I’ve moved away from MA I’ve tried to find a recipe that comes close to those muffins and as far as the zucchini carrot muffins go, I’ll have to go on trying.  But I’ve finally come across the bran muffin recipe that most closely resembles it.  And now you too can have these yummy (and maybe a little bit good for you?) muffins!

INGREDIENTS

1 cup raisins
1 teaspoon water
2 1/4 cups All-Bran Original cereal (5 ounces)
1 1/4 cups unbleached all-purpose flour (6 1/4 ounces)
1/2 cup whole wheat flour (2 1/2 ounces),
2 teaspoons baking soda
1/2 teaspoon table salt
1 large egg
1 large egg yolk
2/3 cup packed light brown sugar (4 2/3 ounces)
3 tablespoons mild molasses (or light) (NOTE: I used the molasses in my cabinet with no regard to whether it was mild or not)
1 teaspoon vanilla extract
6 tablespoons unsalted butter (3/4 stick), melted and cooled
1 3/4 cups plain whole-milk yogurt (NOTE: I used Stoneyfield whole milk, french vanilla, with cream top, yogurt)

INSTRUCTIONS

  1. Adjust oven rack to middle position and heat oven to 400 degrees. Spray standard-sized muffin pan with nonstick cooking spray.
  2. Combine raisins and water in small microwave-safe bowl, cover with plastic wrap, cut several steam vents in plastic with paring knife, and microwave on high power for 30 seconds. Let stand, covered, until raisins are softened and plump, about 5 minutes. Transfer raisins to paper towel-lined plate to cool
  3. Process half of bran cereal in food processor until finely ground, about 1 minute.
  4. Whisk flours, baking soda, and salt in large bowl to combine; set aside.
  5. Whisk egg and yolk together in medium bowl until well-combined and light-colored, about 20 seconds. Add sugar, molasses, and vanilla; whisk until mixture is thick, about 30 seconds. Add melted butter and whisk to combine; add yogurt and whisk to combine. Stir in processed cereal and unprocessed cereal; let mixture sit until cereal is evenly moistened (there will still be some small lumps), about 5 minutes.
  6. Add wet ingredients to dry ingredients and gently mix with rubber spatula until batter is combined and evenly moistened. Do not overmix.
  7. Gently fold raisins into batter.
  8. Using 1/3-cup measure or ice cream scoop, divide batter evenly among muffin cups, dropping batter to form mounds. Do not level or flatten surfaces of mounds.
  9. Bake until muffins are dark golden and toothpick inserted into center of muffin comes out with a few crumbs attached, 16 to 20 minutes, rotating pan halfway through baking. Cool muffins in pan for 5 minutes, then transfer to wire rack and cool for 10 minutes before serving.


Ready for the oven

If anyone has a really great recipe for zucchini/carrot muffins – nice, dark, rich ones, please send it to me!!!


Pork Tenderloin, Spinach, Cauliflower & Pasta November 1, 2009

Filed under: Sides,Vegetable — Kristen @ 7:35 pm
Tags: , , , , , ,

Who knew veggies could taste so good!

Ok, so maybe the pork looks a little under-represented in this pic but trust me, it was there.  And it was GOOD!  But I’m not going to include the recipe for that because I cheated and bought a Smithfield pre-seasoned one in the Golden Rotisserie flavor.  All I had to do was pop it into the oven.  I cheated because I wanted to save all my energy and focus on the side dishes.  I’m SO glad I did because I have never tasted spinach so yummy in all my life.  And let me tell you, I’m no fan of veggies.  They’re definitely not something that I make on a regular basis, that’s for sure.  Other than the family favorites like corn and broccoli.  So if I liked these sides, then they MUST be good.  I even had 3 helpings of the spinach. Note: I found these recipes in the November 2009 issue of Martha Stewart Living. Baby Spinach with Warm Olive Oil & Walnuts Ingredients: 2 oz. Walnuts (about 3/4 Cup) 1/3 Cup extra-virgin Olive Oil 6 oz. Baby Spinach, washed well (about 6 Cups packed) 2 Tbsp. white-wine vinegar (Note: I almost didn’t put this in because it seemed bizarre to me, but I did anyways, and it was fabulous!) Coarse salt and freshly ground pepper

  1. Combine walnuts and oil in small saucepan over medium-low heat.  Cook, stirring occasionally, until walnuts are toasted, about 15 minutes. (Note: I left these simmering in the oil for about 30ish minutes to really infuse the oil with the walnut flavor)
  2. Toss spinach with vinegar, and season with salt and pepper.
  3. Top with walnuts, and drizzle with warm olive oil

Roasted Cauliflower with Pasta and Lemon Zest Ingredients: 1 Lg. head Cauliflower, cut into small florest 1 Red Onion, cut into 1/4″ thick slices 1/4 Cup salt-packed Capers, rinsed (Note: I omitted this item) 1/4 Cup extra-virgin Olive Oil Coarse Salt and Freshly Ground Pepper 8 oz. orecchiette (ear shaped pasta) (Note: I used bowties) 1/2 Cup coarsely chopped fresh flat-leaf parsley 2 Tbsp. finely grated Lemon Zest (Note: I used half)

  1. Preheat oven to 450.
  2. Toss together cauliflower, onion, capers and 2 Tbsp oil.  Season with salt and pepper.  Spread vegetables in a single layer on a  rimmed baking sheet.
  3. Roast, stirring halfway through, until cauliflower is tender and browned, about 40 minutes.
  4. Meanwhile, bring a large pot of salted water to a boil.  Add pasta and cook until al dente, according to package instructions.  Drain.
  5. Toss hot pasta with remaining 2 Tbsp oil, then parsley, and lemon zest.
  6. Add cauliflower mixture, and season with salt and pepper.  Gently toss to combine.